Caramel Sauce by Rose Levy Beranbaum The Pie and Pastry Bible

This sauce is for the caramel lover. It’s equally wonderful over ice cream, cake, or apple pie. It is just thick enough when hot, but not clumpy or sticky as it cools on the plate. Don’t be afraid of making caramel. If you follow the simple but important Pointers for Success below, it will be easy. Do be sure when making it not to have any small children about and give it your undivided attention. Caramel burns are extremely painful.
download (1)
1 cup sugar (7 ounces = 200 grams)
1 tablespoon Lyle’s Golden Syrup (refiner’s syrup) or corn syrup (0.75 ounce = 21 grams)
1/4 liquid cup water (2 ounces = 60 grams)
1/2 liquid cup heavy cream, heated (4 ounces = 116 grams)
2 tablespoons unsalted butter, softened (1 ounce = 28 grams)
1 teaspoon pure vanilla extract

EQUIPMENT
A heavy saucepan, at least 5-cup capacity, ideally with a nonstick lining

In the saucepan, stir together the sugar, syrup, and water until the sugar is completely moistened. Heat, stirring constantly, until the sugar dissolves and the syrup is bubbling. Stop stirring completely and allow it to boil undisturbed until it turns a deep amber (380°F.). Immediately remove it from the heat and slowly and carefully pour the hot cream into the caramel. It will bubble up furiously.

Use a high-temperature heat-resistant rubber spatula, or a porcelain or wooden spoon to stir the mixture until smooth, scraping up the thicker part that settles on the bottom. If any lumps develop, return the pan to the heat and stir until they dissolve. Stir in the butter. The mixture will be streaky but become uniform after cooling slightly and stirring.

Allow the sauce to cool for 3 minutes. Gently stir in the vanilla extract.

For a decorative lacing effect, this caramel pours perfectly at room temperature. For the greatest precision, use a pastry bag with a small decorating tube or a reclosable bag with a small piece cut from one corner.

STORE
Room temperature, up to 3 days; refrigerated, at least 3 months. To reheat: If the caramel is in a microwave-safe container at room temperature, microwave it on high power for 1 minute, stirring twice. If cold, it will take a few seconds more. Alternatively, place it in a bowl in a pan of simmering water and heat, stirring occasionally, until warm, about 7 minutes.

Understanding
Refiner’s or corn syrup helps to prevent the caramel sauce from crystallizing when stirred. It also lowers the caramelization temperature.

I adore the flavor of caramel, so I like to have as much depth of flavor as possible without any burnt flavor. I bring this caramel up to at least 380°F. for maximum flavor. The darker you make the caramel, the less sweet it will seem, but you risk burning it if you don’t have an absolutely accurate thermometer.

It’s best to have the cream hot and the butter at room temperature to avoid splattering when they are added to the hot caramel. Cold cream, however, speeds the cooling and is practical if you’re pressured for time — but it must be added very slowly.

I do not recommend using crème fraîche in place of heavy cream, as it does not decrease sweetness to any significant degree nor does it add interest of flavor.

Unrefined sugar, which contains a small amount of natural molasses — which caramelizes at a slightly lower temperature — provides a flavor that is deliciously reminiscent of butterscotch. The “impurities” in unrefined sugar can cause crysallization so if you use it, care must be taken not to stir the caramel too much.

Pointers for Success
• Most important: When making caramel, be careful to concentrate every moment. Sugar burns are extremely painful.

• Use refined sugar that is absolutely free of impurities, to prevent crystallization.

• To further prevent crystallization, do not allow any sugar crystals to get on the sides of the pan, and be sure to moisten all the sugar with the water. Stop stirring entirely as soon as it comes to a boil. If using a thermometer, be sure to rinse it and dry it if removing and reinserting in the syrup. If any sugar remains on the thermometer, it will cause crystallization.

• Use a pan that conducts heat well (such as unlined copper, aluminum, or anodized aluminum) so that cooking stops soon after it is removed from the heat. Alternatively, have ready a larger pan or sink partly filled with cold water to immerse the bottom of the pan. Do not use a pan with a tin or nonstick lining, as its melting point is below that of caramel.*

• To determine the color of the caramel, use an accurate thermometer or drop a bit of caramel on a white surface such as a porcelain spoon or plate. When making spun sugar, too light a caramel produces a ghostly effect, too dark produces a brassy color when spun.

• To prevent breakage, never put a thermometer used for caramel into water until completely cooled.

• Soaking utensils in hot water will remove hardened caramel.

• After the caramel is prepared, do not stir it too much, as this may eventually cause crystallization.

*There are some special pans, such as the Scanpan, from Denmark, with nonstick properties that can withstand the heat of caramel.

Grandma Carlough’s Midnight Cake (or cupcakes, or bundt cake, or…) from Liz McGowen

10451058_10204378372762868_5513862839625449398_n
1 1/4 cups sugar
2 eggs
1/2 cup cocoa
1/2 cup oil
1/2 tsp. salt
1 1/2 c flour
1 tsp baking soda
1 tsp baking powder
1 cup hot water
1 tsp vanilla

Preheat oven to 350.  Mix first 4 ingredients; mix in rest of dry ingredients; add vanilla to hot water and mix into other ingredients.  Bake in 8″ round cake pans or pour into cupcakes, or bundt pan.  Check with toothpick after 25 minutes.  Delicious, rich, moist, versatile batter – passed down through generations!  I use a mixmaster.  Makes the perfect birthday cake!

cherry almond dutch baby from smitten kitchen

Adapted from Sunset Magazine

14325925810_543c1a3a9c

Let’s talk about almonds for a minute: I think those waxy, often stale, and flavorless cream-colored discs sold as sliced almonds are absolutely terrible tasting — from the package. But I buy them anyway because they are so magically transformed by toasting, becoming crisp, sweet and intensely fragrant, that I want to put them on everything when I’m not eating them straight. Please, do not go easy on your almonds; spread them on a tray, bake them for 8 to 10 minutes at 350, tossing them around once or twice for even color, and not taking them out until they’re deeply golden brown. Make more than you’ll need so you’ll have them for everything else (like broccoli slaw!).

3 large egg
2 tablespoons granulated sugar
3/4 cup all-purpose flour
3/4 cup milk
1/2 teaspoon almond extract (more or less to taste)
Pinch of salt
4 tablespoons butter
2 cups pitted sweet cherries
1/2 cup sliced almonds, well-toasted
Powdered sugar
Lemon wedges

Heat oven to 425°F. Whisk egg, sugar, flour, milk, extract and salt together until the batter is blended but lumpy; you can also do this in a blender. In a 12-inch ovenproof frying pan, melt butter. Add cherries and cook until warmed, about 2 minutes. Pour in batter and transfer to heated oven. Bake for 15 to 20 minutes, until golden brown and rumpled-looking. (I err on the side of more cooking time with these pancakes, because I find the longer, within a range, they cook, the more rumpled and golden they get.)

Remove pancake from oven and quickly scatter with toasted almonds, dust with powdered sugar and squeeze lemon juice over. Serve in wedges, piping hot.  Serves 2 generously or 4 petitely


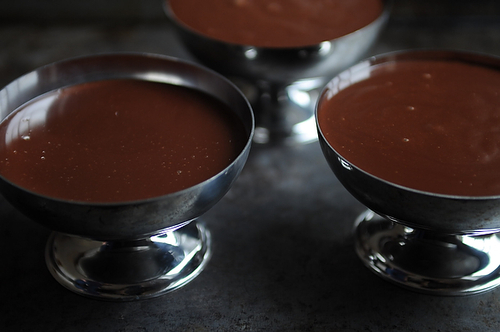
Chocolate Pudding from food52

Food52

2 large egg yolks
3 tablespoons tapioca flour
1/4 cup plus 1 teaspoon sugar
1/2 cup heavy cream
1 cup whole milk
1/2 teaspoon fine sea salt
1/2 teaspoon vanilla extract
6 ounces 66% cacao dark chocolate, chopped
Unsweetened whipped cream, for serving (optional)

Put the egg yolks and tapioca flour in a blender and blend on low speed until a light-colored paste forms.

Combine the sugar, cream, milk, salt, and vanilla in a saucepan set over medium heat. Bring the mixture to a boil, then remove it from the heat. Turn the blender containing the egg and tapioca mixture back on low. Quickly and carefully, pour the hot milk mixture into the blender and increase the speed to medium. The heat will cook the egg yolks and allow the tapioca to thicken to the consistency of thick mayonnaise.

With the blender running, add the chocolate in stages so it is emulsified into the pudding. When all the chocolate is added, strain the pudding into a serving bowl (or 3 to 4 serving bowls) and let it cool to room temperature before transferring to the refrigerator to cool completely. Top with whipped cream if you like. Serves 3 to 4

Red, White, and Blue Berry Trifle from Martha Stewart

trifle-0711meed107220-jul006e_vert

1.5 pounds raspberries (5 cups)
3/4 cup confectioners’ sugar
1/4 cup fresh orange juice (from 1 large orange)
10 ounces mascarpone  (1 1/3 cups)
1 1/4 cups cold heavy cream
1/2 teaspoon pure vanilla extract
Fine salt
20 to 24 ladyfingers (from a 7-ounce package), broken into 1-inch pieces
3/4 pound blueberries (2 1/2 cups)

In a medium bowl, combine raspberries with 1/4 cup confectioners’ sugar and orange juice. With the back of a fork, lightly mash berries to release their juices and let sit 10 minutes. Meanwhile, in a large bowl, stir together mascarpone and 1/2 cup confectioners’ sugar until smooth.

Whisk in cream,vanilla, and pinch of salt and whisk until soft peaks form, about 4 minutes.

Cut one or two pieces parchment 1 inch taller than side of an 8-inch springform pan and line inside of pan. Place half the ladyfingers in pan and top with half the raspberry mixture. With a small offset or rubber spatula, spread half the whipped cream over berries. Tap pan gently on counter to remove air bubbles. Repeat with remaining ladyfingers, raspberry mixture, and whipped cream.

Top with blueberries and refrigerate until whipped cream is stiff and cookies have softened, about 3 hours (or, tightly covered with plastic, up to 3 days). To serve, unmold trifle and peel away parchment.

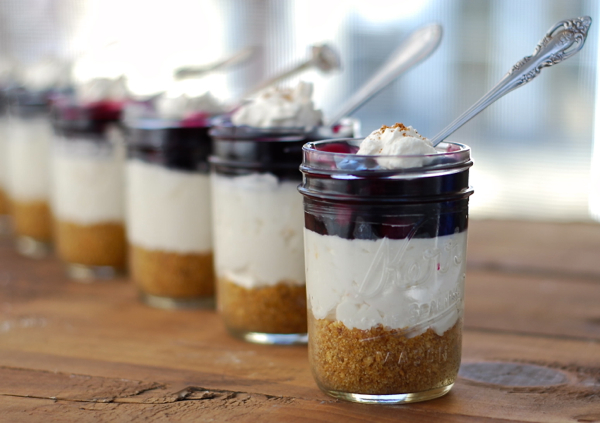
blueberry cheesecake jars from www.chindeep.com/

cheesecakejars

They’re easy to put together, cute, and they travel well too. If blueberries aren’t your thing, you can easily substitute cherries, lemon, chocolate pudding, or peaches for the blueberries. Just make sure you’re using ready-to-go pie filling, and not just canned fruit, or your cheesecakes will get soggy.

for the graham cracker crust layer:
1 heaping cup of graham cracker crumbs
3 Tablespoons brown sugar
1/4 teaspoon cinnamon
1/4 teaspoon salt
1/4 cup melted butter

Combine all of the graham cracker crust ingredients and “tamp” about 3 Tablespoons into each of 6 half-pint canning jars.

for the cheesecake layer:
8 oz. cream cheese, room temperature
1/2 cup sugar
1/2 cup sour cream
2 Tablespoons fresh lemon juice
2 teaspoons vanilla extract
1 teaspoon lemon or orange zest

Place all of the cheesecake ingredients in the bowl of a counter top mixer. Whip until smooth and fluffy. Divide evenly among the 6  (half pint) jars… on top of the graham cracker crust layer.

for the blueberry layer:

TIP: a little almond extract will make canned pie filling taste fresh and wonderful!
1 (20 oz.) can blueberry pie filling
1/4 teaspoon pure almond extract

Mix fruit filling with extract and divide evenly among the 6 jars. Place lids on jars an refrigerate until ready to eat.

Add a dollop of whipped cream to the tops of the jars and sprinkle with a little nutmeg if desired. ~ serves 6 ~

Valerie’s French Chocolate Cake from http://smittenkitchen.com/

14413653206_7b449e09ee

9 9 tablespoons (125 grams) unsalted butter
7 ounces (200 grams) bittersweet (70/72 percent) chocolate, chopped
3 tablespoons water
3/4 teaspoon baking powder
1/3 cup (40 grams) all-purpose flour
1/3 cup (about 30 grams) dark cocoa powder, sifted if lumpy (Dutched or natural will work here; I use Dutched)
4 large eggs, separated
1 cup (200 grams) granulated sugar
1/2 teaspoon vanilla extract (optional)
Two pinches sea salt

Heat oven to 350 degrees. Butter a 9-inch round cake pan. Line the bottom of the baking pan with a round of parchment paper.

Melt butter in a large saucepan, 3 quarts is a good size. Once melted, remove from heat and stir in chocolate until melted. Once melted, stir in 2 tablespoons water, then baking powder, flour and cocoa until just combined.

In a medium bowl, whisk egg yolks with sugar, 1 tablespoon water and vanilla, if using, until pale and no longer lumpy. Stir into chocolate mixture until just combined.

In a larger, very clean bowl, beat egg whites and salt until stiff. Gently fold into chocolate mixture until most of the white streaks disappear. Be careful not to deflated cake.

Bake for 25 to 30 minutes, until a toothpick inserted into the center of the cake comes out batter-free. Remove from oven and rest on rack for 5 minutes. Run knife along outside cake to make sure it isn’t sticking anywhere, then invert onto another rack, then back onto a cake plate. Eat warm or cold.

Cake keeps for several days at room temperature, lightly wrapped.

To make a layer cake: Several hours and up to a full day before you will fill the cake, make chocolate whipped cream. I used Alice Medrich’s recipe as a base. Heat 1 cup heavy or whipping cream to a simmer in a saucepan. Remove from heat, whisk in 6 ounces chopped semisweet chocolate until fully melted and smooth. Stir in a second cup of cold heavy or whipping cream. Cover dish with plastic and let chill in the fridge for at least four hours and preferably overnight, or up to 24 hours.

To make the layer cake, make twice the recipe above, but divide it into 3 9-inch cake pans. Each layer will bake for approximately 15 to 20 minutes. Let cool completely. I find popping cake layers into the freezer for 20 to 30 minutes stiffens them enough that they are easily lifted and stacked and highly recommend it.

Using electric beaters, whip fully chilled chocolate cream into whipped cream. It will whip very quickly; don’t let it overwhip (it will become rough-looking). If it does, a splash of still-liquid heavy cream whisked in will loosen the mixture a bit again. Set a spoonful of the chocolate whipped cream aside if you’d like to write on the top of the cake. Spread half of the chocolate whipped cream on the first cake layer, then top with the second. Spread second half of chocolate whipped cream on second cake layer, then top with the third. If writing on the cake, place chocolate whipped cream set aside in a sandwich bag with the corner snipped off, or in a piping bag with a small round tip and scribble away.

Keep cake in fridge until needed. Serves 8 generously, 16 if you, like us, prefer slim wedges of rich cake

Apple Tarts by Ina

apple.tart.blog.photo4_grande
1 package (2 sheets) frozen puff pastry, defrosted
4 small (6 ounce) Granny Smith apples
3/4 cup sugar
6 tablespoons (3/4 stick) cold unsalted butter, small-diced
3/4 cup apricot jelly or warm sieved apricot jam
3 tablespoons Calvados, rum, or water

Preheat the oven to 400 degrees. Line 2 sheet pans with parchment paper.

Cut each sheet of puff pastry into 4 squares. Divide the pastry between the prepared sheet pans and refrigerate while you prepare the apples.

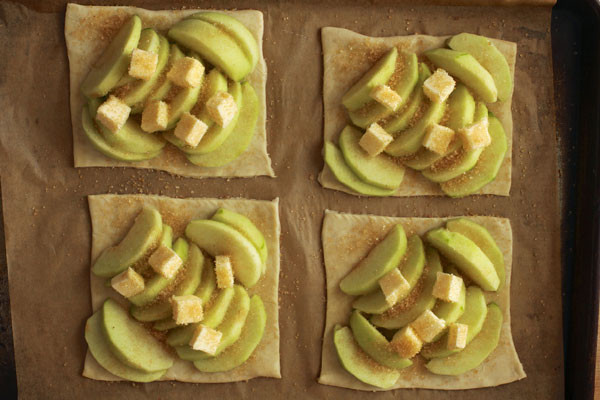
Peel the apples and cut them in half through the stem. Remove the stems and cores with a sharp knife and a melon baller. Slice the apples crosswise in 1/4-inch-thick slices. Place overlapping slices of apples diagonally across the pastry and place one slice of apple on each side of the arranged slices. Sprinkle the apples evenly with the sugar and dot them with the butter.

Bake for 40 minutes, until the pastry is browned and the edges of the apples start to brown. Don’t worry! The apple juices will burn in the pan but the tarts will be fine! When the tarts are done, heat the apricot jelly together with the Calvados until bubbly and brush the apples and pastry completely with the jelly mixture. Loosen the tarts with a metal spatula so they don’t stick to the paper. Allow to cool and serve warm or at room temperature.

Read more at: http://www.foodnetwork.com/recipes/ina-garten/apple-tarts-recipe.html?oc=linkback

Banana Chocolate Nut Bread from Fanny Farmer

IMG_2930
3 ripe bananas, well mashed
2 eggs, well beaten
2 cups flour
3/4 cup sugar
1 teaspoon salt
1 teaspoon baking soda
1/2 cup nut meats, coarsely chopped (I prefer walnuts)
1/2 – 1 c. chocolate chips

Preheat oven to 350 degrees. Grease a loaf pan. Mix in a bowl 3 ripe bananas, well mashed, and 2 eggs, beaten until light. Sift together 2 cups flour, 3/4 cup sugar, 1 teaspoon salt, and 1 teaspoon baking soda. Add to the first mixture. stir until mixed. Add 1/2 cup chopped nut meats and chocolate chips. Stir well.

Put in a buttered loaf pan 9 by 5 inches. Bake 1 hour at 350 degrees Fahrenheit. Remove from pan to a rack. Serve still warm or cooled, as you like it.

Molten Chocolate Cake – Ree Drummond

3766580565_99ce8cf1c5_o

4 pieces (squares) Semi-sweet Baking Chocolate
1/2 cups Butter
1 cup Powdered Sugar
2 whole Eggs
2 whole Egg Yolks
6 tablespoons Flour
2 cups Real Whipping Cream
2 tablespoons Sugar

Preheat oven to 425 degrees.

Spray 4 custard cups with Pam and place on cookie sheet.

Microwave chocolate and butter in large bowl on high for about 1 minute, until butter is melted. whisk until chocolate is also melted.

Stir in sugar until well blended. Whisk in eggs and egg yolks. Stir in flour.

Divide between cups.

Bake 13-14 minutes until sides are firm and center is soft. Let stand 1 minute.

Preheat oven to 425 degrees.

Spray 4 custard cups with Pam and place on cookie sheet.
Microwave chocolate and butter in large bowl on high for about 1 minute, until butter is melted. whisk until chocolate is also melted.

Stir in sugar until well blended. Whisk in eggs and egg yolks. Stir in flour.
Divide between cups.

Bake 13-14 minutes until sides are firm and center is soft. Let stand 1 minute.

Combine sugar and heavy cream and whip until stiff. Invert cakes on dishes and top with whipped cream