1/2 cup (4 ounces or 115 grams) unsalted butter, plus extra for pan
1 1/3 cups (265 grams) granulated sugar
2 large eggs
1 teaspoon (5 ml) vanilla extract
1/2 teaspoon flaky sea salt or 1/4 teaspoon table salt
2/3 cup (85 grams) all-purpose flour
Heat oven to 350°F. Line an 8×8-inch square baking pan with parchment, extending it up two sides, or foil. Butter the parchment or foil or spray it with a nonstick cooking spray.
In a medium heatproof bowl over gently simmering water, melt chocolate and butter together until only a couple unmelted bits remain. Off the heat, stir until smooth and fully melted. You can also do this in the microwave in 30-second bursts, stirring between each. Whisk in sugar, then eggs, one at a time, then vanilla and salt. Stir in flour with a spoon or flexible spatula and scrape batter into prepared pan, spread until even. Bake for 25 to 30 minutes, or until a toothpick inserted into the center comes out batter-free.
Let cool and cut into desired size. If you’re like me, you will prefer these and all brownies, cold, from the fridge. But I bet you’re normal and will just eat them hot from the pan. If desired, dust the brownies with powdered sugar before serving.
3/4 cup dried cherries (dried cranberries or apricots would be good, too)
1 Tablespoon honey
1 and 1/2 cups warm water (about 95 degrees)
6 quart or higher dutch oven or 2 smaller dutch ovens, if making small loaves, or any large oven-safe pot with a lid.
Stir the first 6 ingredients together in a large bowl. Stir in the warm water. The dough will be pretty sticky– you want a sticky dough! Gently shape into a ball as best you can. Cover tightly with plastic wrap or aluminum foil. Set on the counter at room temperature, and allow to rise for 12-18 hours. The dough will double in size, stick to the sides of the bowl, and be covered in air bubbles.
Turn the dough out onto a lightly floured work surface and, using lightly floured hands, shape into a ball as best you can. Transfer dough to a large piece of parchment paper. (Large enough to fit inside your pot and one that is safe under such high heat.
Using a very sharp knife, gently score an X into the top. Cover dough lightly with plastic wrap and leave alone for 30 minutes.
During this 30 minutes, preheat the oven to 475 degrees. Place your dutch oven (with the lid) or heavy duty pot inside for 30 minutes so that it’s extremely hot before the dough is placed inside. After 30 minutes, remove the dutch oven from the oven and carefully place the dough inside by lifting it up with the parchment paper and sticking it all– the parchment paper included– inside the pot. Cover with the lid.
Bake for 25 minutes with the lid on. Carefully remove the lid and continue baking for 8-10 more minutes until the bread is golden brown. Remove pot from the oven, carefully remove the bread from the pot, and allow to cool on the counter for 30 minutes before breaking/slicing/serving.
Cover and store leftover bread at room temperature for 1 week.
½ cup unsweetened cocoa powder 1 cup white granulated sugar ½ cup melted butter 3 tablespoons vegetable oil 1 egg 2 teaspoons pure vanilla extract 1 ⅓ cups all purpose flour or plain flour ½ teaspoon baking powder ½ teaspoon salt ⅓ cup semi sweet chocolate chips add more if desired
Preheat oven to 350°F (175°C). Line 2 cookie sheets or baking trays with parchment paper (baking paper).
In a medium-sized bowl, mix together the cocoa powder, white sugar, butter and vegetable oil. Beat in egg and vanilla until fully incorporated.
Add the flour, baking powder, and salt; stir the dry ingredients first before mixing them through the wet ingredients until a dough forms (do not over beat). Fold in the chocolate chips.
Scoop out 1-2 tablespoonful of dough with a cookie scoop (or small ice cream scoop), and place onto prepared baking sheets. Press them down as thick or thin as you want your cookies to come out.
Bake in hot preheated oven for 10-12 minutes. The cookies will come out soft from the oven but will harden up as they cool. (Be careful not to over bake as they will dry out.)
Allow to cool on the cookie sheet for 10 minutes before transferring to wire racks to cool.
Tip: Take the cookies out of the oven while they are still slightly soft in the centre and let them cool. This will provide you with that gooey, soft texture.
3/4 cup plus 2 tablespoons unsweetened cocoa powder (natural or Dutch-process)
1/4 teaspoon salt (or a heaping 1/4 teaspoon flaky salt, as I used)
1/2 teaspoon pure vanilla extract
2 large eggs, cold
1/2 cup all-purpose flour
2/3 cup walnut or pecan pieces (optional)
Position a rack in the lower third of the oven and preheat the oven to 325°F. Line the bottom and sides of an 8×8-inch square baking pan with parchment paper or foil, leaving an overhang on two opposite sides.
Combine the butter, sugar, cocoa, and salt in a medium heatproof bowl and (Medrich’s method) set the bowl in a wide skillet of barely simmering water. Stir from time to time until the butter is melted and the mixture is smooth and hot enough that you want to remove your finger fairly quickly after dipping it in to test. Or (Deb’s method) you can melt the butter with the cocoa in a microwave too.
Both methods: Set the bowl aside briefly until the mixture is only warm, not hot. It looks gritty at this point, but don’t fret — it smooths out once the eggs and flour are added.
Stir in the vanilla with a wooden spoon. Add the eggs one at a time, stirring vigorously after each one. When the batter looks thick, shiny, and well blended, add the flour and stir until you cannot see it any longer, then beat vigorously for 40 strokes with the wooden spoon or a rubber spatula. Stir in the nuts, if using. Spread evenly in the lined pan.
Bake until a toothpick plunged into the center emerges slightly moist with batter, 20 to 25 minutes is Medrich’s suggestion but it took me at least 10 minutes longer to get them set. Let cool completely on a rack. (I go further and throw mine in the fridge or freezer for a while; it’s the only way I can get them to cut with clean lines.)
Lift up the ends of the parchment or foil liner, and transfer the brownies to a cutting board. Cut into 16 or 25 squares.
1/2 cup (113g) unsalted butter, diced into tablespoon-sized pieces
4 large eggs, separated
2/3 cup (135g) granulated sugar
2 teaspoons vanilla extract
1/4 teaspoon kosher salt
1/8 teaspoon ground nutmeg (optional)
3/4 cup (90g) all-purpose flour
Powdered sugar, for dusting, optional
Preheat the oven to 325°F. Grease an 8-inch square pan with butter or cooking spray. Line the pan with a layer of parchment paper covering the bottom and up 2 sides with a slight overhang. Lightly grease the parchment paper.
Heat the milk and butter: In a small saucepan, heat the milk and butter on low heat just until the butter melts. Don’t let the milk come to a boil or simmer. It should be warm but not scalding hot, 105 to 115°F. Set aside.
Meanwhile, beat the egg whites: In a large bowl using a hand mixer, beat the egg whites on medium-high speed until they form stiff peaks, about 4 minutes. When you lift the beaters out of the bowl, the whipped egg whites should stand up at a point and hold that point
Start the batter: In another large bowl, beat the egg yolks, sugar, vanilla extract, salt, and nutmeg (if using) on high speed until the mixture is pale and creamy, about 2 minutes.Add the flour to the egg yolk mixture and beat on low speed until combined. It may seem like there is too much flour, but the batter will soon be thinned out.
Add the warm milk and egg whites: Continue mixing on low speed, or switch to a whisk, and pour in the warm milk and butter a splash at a time. Once you’ve incorporated about half of the milk mixture, you can pour in the rest, and whisk to combine. The batter will be thin and smooth, like crepe batter.Add the beaten egg whites and use the whisk to gently mix until there are no large lumps of egg whites. Don’t overmix—there should still be a layer of foam on top of the batter.
Bake: Pour the batter into the prepared pan. Bake until the top is golden brown, the cake has begun to pull away from the sides of the pan, and the center has a slight jiggle when the pan is gently shaken, about 50 minutes.
Cool and serve: Remove the pan from the oven and set it on a wire rack until it’s cool enough to go in the fridge, about 30 minutes. Let the cake chill in the fridge for at least 1 hour before serving. You can skip chilling and serve the cake at room temperature, though it won’t slice as neatly.Dust the top of the cake with powdered sugar, then slice it into squares. If desired, serve with fresh fruit and, for extra indulgence, a dollop of whipped cream.Store leftover magic cake, well-covered, in the refrigerator for up to 3 days. Magic cake does not freeze well. The freezing and thawing process will affect the texture of the custard layer.
Marian Burros’s plum torte is a cult classic in which a mass of plums are coated with cinnamon sugar and baked into a pancake-like batter, where they melt into pie-like pockets and you definitely don’t want to miss it. It’s the perfect September baked good. This is ideal with blueish/purple Italian prune plums, but if you can’t find them, other plums will do. The internet is full of riffs on the cake, like cutting the sugar back to 3/4 cup (feel free to, although I didn’t find the 1 cup too sweet at all), with or without lemon juice, ranges of cinnamon (1 teaspoon is the original amount; 1 tablespoon was a typo that’s not bad at all, but I usually use the smaller amount). I’m not immune, either: I sometimes start by browning the butter and letting it cool to room temp before whisking the batter together by hand. In 2023, I’ve made a few minor updates: Sharing how I one-bowl the cake,and bumping up the salt (previously: a large pinch).
12 smallish purple Italian purple plums, halved and pitted
2 teaspoons (10 grams) fresh lemon juice
1 teaspoon ground cinnamon
Heat oven to 350°F. Coat a 9-inch springform [I have this one] with butter or nonstick spray. For even easier removal, line the bottom with a round of parchment paper.
In a large bowl, beat butter and 1 cup (200 grams) of the sugar together with an electric mixer until fluffy and lighter in color. Add the eggs, one at a time and scraping down the bowl. Sift flour, baking powder, and salt over batter and mix it until just combined.
Spoon batter into prepared cake pan and smooth the top. Arrange the plum tightly in the pan, skin side up, all over the batter, covering it. Sprinkle the top with lemon juice, then cinnamon, then remaining sugar.
Bake until cake is golden and a toothpick inserted into a center part of the cake comes out free of batter (but of course not plum juice), about 45 to 50 minutes. Cool on rack.
Once cool, if you can stand it, and I highly recommend trying, leave it at room temperature overnight as this cake is even better on the second day, when those plum juices further release into the cake around it, becoming not just “cake with plum,” but cakeplumughyum (official terminology, there). If planning more than 2 to 3 days out, I’ll store the cake in the fridge for longevity.
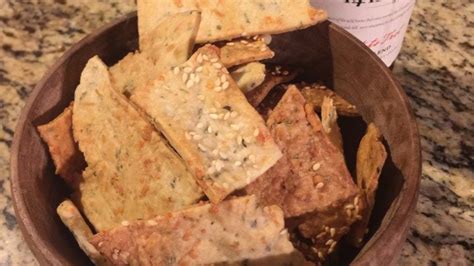
1 teaspoon white sugar ½ cup freshly grated Parmigiano-Reggiano cheese
3 tablespoons extra-virgin olive oil
½ cup cold water
1 tablespoon minced fresh rosemary
Preheat oven to 400 degrees F (200 degrees C). Line a baking sheet with a silicon mat or parchment paper.
Place flour, salt, sugar, and grated cheese in a mixing bowl. Stir together until well mixed. Add rosemary; drizzle with olive oil and add water. Mix with a fork until mixture comes together in a fairly sticky dough and pulls away from the sides of the bowl, 3 to 5 minutes.
Transfer dough onto floured surface and add flour as you knead the dough. Knead until it no longer sticks to work surface, 4 to 5 minutes. Divide dough in half.
Dust work surface with flour. Roll out dough to 1/8-inch thickness or less. Brush or mist surface of dough very lightly with water. Sprinkle with coarse sea salt. Prick the entire surface of dough with the tines of a fork to prevent crackers from puffing too much when baking.
Cut each rolled out half into about 30 pieces with a pizza wheel. You can cut them out in squares, rectangles, or triangles–your choice. Transfer onto prepared baking sheet with a bench scraper or your floured fingers (dough will be very sticky).
Bake in preheated oven until perfectly browned and crunchy, 10 to 15 minutes, depending on the thickness.