Pickled Red Onions from Terry

This is something you must have on hand in the summer. On the other hand these really pump up a sandwich anytime of the year.

images (1)


1 1/2 cups red wine vinegar
1/4 cup water
2 tablespoons sugar
1 tablespoon kosher salt
1 medium red onion, peeled, halved and thinly sliced

Bring vinegar, water, sugar and salt to a boil in a small saucepan over medium heat. Remove from the heat and let cool for 10 minutes. Put the onions in a medium bowl, pour the vinegar over, cover and refrigerate for at least 4 hours and up to 48 hours before serving.

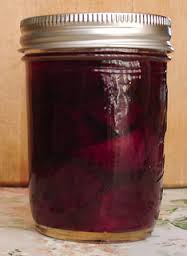
Pickled Beets/fermented beets Sally Fallon

download

12 medium organic beets
seeds from 2 cardamom pods (optional)
4 Tablespoons whey
1 Tablespoon Celtic Sea Salt
filtered water

Prick beets in several places, place on a cookie sheet and bake at 300 degrees for about 3 hours (see note above for alternative cooking), or until soft. Peel and cut into a 1/4 inch julienne. Do not grate or cut the beets with a – this releases too much juice and the fermentation process will proceed too quickly, so that it favors formation of alcohol rather than lactic acid.
Place beets in a quart-sized, wide mouth mason jar and press down lightly with a wooden pounder or a meat hammer. Combine remaining ingredients and pour over beets, adding more water if necessary to cover the beets. The top of the beets should be at least 1 inch below the top of the jar. Cover tightly and keep at room temperature for about 3 days before transferring to cold storage.

How to Make Compote Without a Recipe – http://food52.com/blog

14199752717_4893da2c76_b1. Choose your fruit! Go with whatever’s in season — we got our hands on some sweet strawberries, but late summer berries, stone fruits, apples, and even eggplant would work as well. And remember: This is a prime opportunity to use bruised specimens: With a little heat, acid, and sugar, the ugly duckling will transform into a beautiful, fruit-laden swan.

Also get out: Some source of acid, such as lemon, lime, or even a splash of vinegar; a sweetener, such as maple syrup, sugar, or honey; a pinch of salt, and anything else you’d like to flavor the compote. I went with vanilla, but cinnamon, cloves, or even a hint of chili would all be great add-ins, depending on the fruit in question. Play around with it until you find a combination that’s your jam, pun intended.

2. Cut off any inedible parts of your fruit (here’s what to do with your strawberry tops), zest your citrus, scrape out your vanilla bean, then toss everything into a saucepan. If you want your compote to have a thinner consistency, add in a few splashes of water or juice.

3. Set the mixture on the stove over low heat, then forget about it. When the heavenly aroma of fresh berry fields comes wafting from your kitchen, give it a stir or two — it’s not needy. Let the fruit break down as much or as little as you like (sometimes I like mine to be more closely akin to fruit swimming in syrup, as in this grits recipe). When the fruit is to your desired level of softness and the whole thing looks glossy, the compote is done. Don’t worry if it seems thin — it will thicken as it cools.

4. Give the compote a taste, then adjust the flavorings until sweet, sour, and savory meet in your ideal balance. If you’re feeling frisky, feel free to add a splash of bourbon or rum. You could also stir in some chopped, dried fruit for texture. Once it cools, you could also purée the mixture until smooth, thinning it out as needed with water. Pour it over pancakes, or add a splash to brighten up your cocktails.

5. Once it’s cool, store your compote in a tightly sealed jar and keep refrigerated for up to two weeks. Spoon it overvanilla ice cream, swirl it into your morning yogurt, and spread it on fat slices of golden challah bread. Lord knows we did.


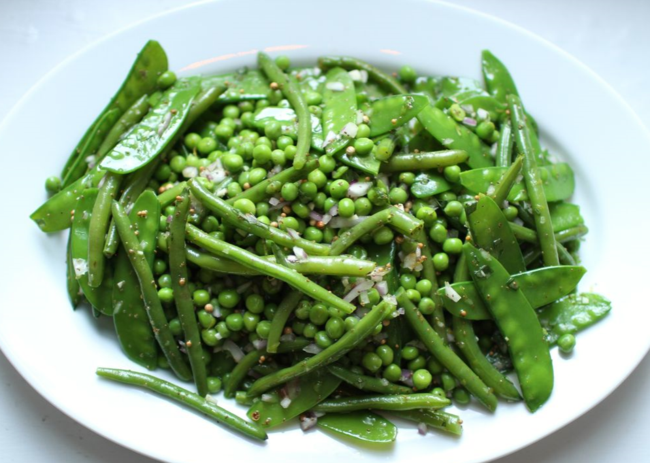
Green Bean Salad with Mustard Seeds and Tarragon From Plenty by Yotam Ottolenghi and Sami Timimi

6a00e55015ee52883301a73dd9c057970d-650wi

1 1/4 cups green beans, trimmed
2 1/4 cups snow peas, trimmed
1 3/4 cups green peas (fresh or frozen)
2 tsp coriander seeds, roughly crushed with a mortar and pestle
1 tsp mustard seeds
3 Tablespoons olive oil
1 teaspoon nigella seeds
1/2 small red onion, finely chopped
1 mild fresh red chile, seeded and finely diced
1 garlic clove, crushed
grated zest of 1 lemon
2 Tablespoon chopped tarragon
coarse sea salt
1 cup baby chard leaves (optional)

Fill a medium saucepan with cold water and bring to the boil. Blanch the green beans for 4 minutes, then immediately lift them out of the pan and into the iced water to refresh. Drain and dry.

Bring a fresh pan of water to the boil and blanch the snow peas for 1 minute only. Refresh, drain and dry. Use the same boiling water to blanch the peas for 20 seconds. Refresh, drain and dry. Combine the beans, snow peas and peas in a large mixing bowl.

Put the coriander seeds, mustard seeds and oil in a small saucepan and heat up. When the seeds begin to pop, pour the contents of the pan over the beans and peas. Toss together, then add the nigella seeds, red onion, chile, garlic, lemon zest and tarragon. Mix well and season with salt to taste.

Just before serving, gently fold the chard leaves, if using, in with the beans and peas, and spoon the salad onto plates or into bowls.

Chef notes:

  • For what it’s worth, we didn’t use separate pans of boiling water for the snow peas and green beans as the recipe instructs. We just used one pan of water.
  • We used frozen peas and omitted the optional baby chard leaves. (We love how they look in the salad pictured in the cookbook, but we didn’t have access to baby chard leaves.)
  • We didn’t have nigella seed so we added a bit of coarsely ground black pepper instead.

How to Ferment Cabbage and Make Sauerkraut

http://toriavey.com/toris-kitchen/2013/06/how-to-ferment-cabbage-and-make-sauerkraut/
Fermentation crock
Cabbage – amount varies based on your needs (we used 2 large heads)
Large mixing bowl
Kosher salt
Kitchen scale
2 fermentation weights
Medium saucepan

Start by boiling 6 cups of water with 1 tbsp of kosher salt till salt is dissolved. Allow to cool.

Meanwhile, clean your cabbage and pull off 5-6 of the external whole leaves, set aside. Shred the remaining cabbage.

Cover the bottom of your fermenting pot with 3-4 whole cabbage leaves. You will only need two layers of whole leaves in the crock, one on the bottom and one on the top.

You will need to salt the shredded cabbage before adding it to the fermentation pot. We found this is easiest to do in smaller batches, to keep the salting amount consistent and mixed throughout the fermentation crock. Measure out 2 pounds of shredded cabbage into a bowl (we zeroed our scale with the bowl on, then measured a 2 pound batch).

Place the salted, shredded cabbage into the fermentation pot on top of the whole leaves.

Measure out another 2 pounds of the shredded cabbage and mix with 1 tsp of salt, then add to the fermenting pot. Repeat this process in batches until all of your shredded cabbage has been salted and added to the pot. Pack down the cabbage tightly, but do not crush the cabbage strips.

Cover the top of your shredded cabbage with remaining whole cabbage leaves. These leaves will help to collect the yeast and mold that may accumulate at the top of the crock, and can easily be removed and discarded after the fermentation process is complete.

Place stone fermentation weights on top of the whole cabbage leaves and press down, but not too hard. You don’t want to damage the cabbage.

Cover the fermentation crock with a lid. The salt will naturally draw some water out of the cabbage. After a few hours, check to see how much liquid has accumulated inside of the pot. It should be about 1-3 inches above the cabbage. If this hasn’t happened, add cooled, boiled salt water to the pot. We ended up needing about 3-4 cups of salt water. Pour it over the cabbage till it is submerged (you may not need to do this if your cabbage has created enough natural liquid). Reserve the remaining salt water.

Once the water level is where it should be, cover the pot and fill the channel around the lid with cooled salt water to create an airtight seal. This will keep oxygen out of the pot. Once this has been done, do not open the fermentation pot for at least 2 weeks. No peeking! Reserve the remaining salt water brine in a sealed container in the refrigerator; you will need it over the course of the next several weeks.

For the first few days, store the pot in a warm place, between 68 and 72 degrees. After a few days have passed, listen for a fizzy, bubbling sound coming from the pot. This is good and means that fermentation has begun. If you don’t hear anything, don’t worry, it may just mean that the walls of your crock are too thick for sound to travel through. After fermentation has started, move the pot to a cool place, between 59 and 64 degrees, for the remaining fermentation time. If you don’t hear anything after 1 week, go ahead and move the crock to a cooler location without waiting for it to sound bubbly.

Check your water channel regularly to make sure that it’s filled with salt water. At times, the pressure which builds up inside the crock can cause suction, which pulls the channel water into the crock (it happened to us a few days in). If this happens, pour more of the salt water into the channel to keep it full.

After the first 2 weeks, check your sauerkraut’s brine level and skim off any mold or bubbles that have gathered near the top. Be sure that your cabbage is always submerged in the brine. Fermentation breeds strange sounds and smells, so try not to worry about those. Close the fermentation crock again and refill the channel with salt water.

Your sauerkraut should be ready in about 4-6 weeks. You will know for sure once bubbles no longer appear in the liquid. The longer you allow the cabbage to ferment, the tangier the flavor will be.

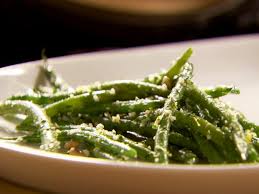
Green Beans Gremolata, Ina

gb
1 pound French green beans, trimmed
2 teaspoons minced garlic (2 cloves)
1 tablespoon grated lemon zest (2 lemons)
3 tablespoons minced fresh flat-leaf parsley
3 tablespoons freshly grated Parmesan cheese
2 tablespoons toasted pine nuts
2 1/2 tablespoons good olive oil
Kosher salt and freshly ground black pepper

Bring a large pot of water to a boil. Add the green beans and blanch them for 2 to 3 minutes, until tender but still crisp. Drain the beans in a colander and immediately put them into a bowl of ice water to stop the cooking and preserve their bright green color.

For the gremolata, toss the garlic, lemon zest, parsley, parmesan, and pine nuts in a small bowl and set aside.

When ready to serve, heat the olive oil in a large saute pan over medium-high heat. Drain the beans and pat them dry. Add the beans to the pan and saute, turning frequently, for 2 minutes, until coated with olive oil and heated through. Off the heat, add the gremolata and toss well. Sprinkle with 3/4 teaspoon salt and 1/4 teaspoon pepper and serve hot.

Rosemary Onion Skillet Potatoes

rosemary onion potatoes 2

1 tablespoon butter
1 large sweet onion, cut into 1/2″ pieces, about 1 cup’s worth
3 medium russet potatoes, cut into 1/2″ pieces, about 4 cup’s worth
1 tablespoon olive oil
1 tablespoon minced fresh rosemary
1 teaspoon kosher salt
1/4 teaspoon freshly cracked black pepper

Melt the butter in a large skillet over medium high heat. Add the onions, toss to coat and then cook for about 5 minutes, stirring occasionally, until they are soft and browned. Add the potatoes to the skillet, drizzle lightly with oil and then sprinkle with rosemary, salt and pepper. Stir to combine and then spread flat across the skillet.

Cover with lid and reduce heat to medium. Let the potatoes cook for 10 minutes. Stir and cover with lid again. Cook 5 more minutes. Remove lid, stir and cook uncovered, for about 5 more minutes, stirring occasionally until the potatoes are browned. The potatoes should be soft and well browned. Serve as is, or increase the heat to medium high and continue cooking in an open skillet, stirring every 2-3 minutes, until slightly crispy. Serve hot or let cool and store in the refrigerator until ready to serve. Potatoes can be reheated in a hot skillet for a few minutes just before serving. Enjoy! 6 servings from http://www.barefeetinthekitchen.com/

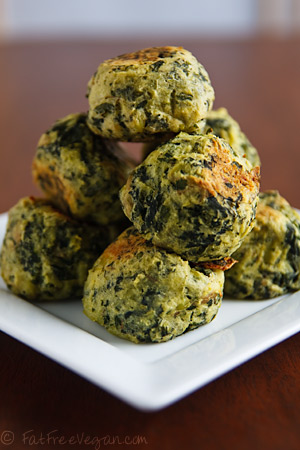
Colcannon Puffs from fatfreevegan.com

colcannon-puffs

To save time, you can also form these into larger patties and pan-fry in a non-stick skillet.

1 1/2 pounds potatoes (you can peel if you want, but I didn’t)
6 ounces kale
2 tablespoons nutritional yeast
2 teaspoons salt (or to taste)
1 teaspoon onion powder
1/2 teaspoon garlic powder
1/2 teaspoon thyme
1/4 teaspoon freshly ground black pepper
2 tablespoons soymilk
2 tablespoons potato starch or corn starch

Cut the potatoes into small cubes (about 1/2-inch), put them in a large pot, and cover with water. Bring to a boil and cook until potatoes are tender.

While the potatoes are cooking, remove the center stalk from the kale and slice the leaves into strips. When the potatoes are done, lift them out with a slotted spoon and place in a large mixing bowl. Put the kale into the potato water and cook for 6 minutes or until kale is tender. Remove kale with a slotted spoon to a food processor. Add 1/4 cup of the cooking liquid and pulse to chop fine.

Preheat oven to 425 F. Mash the potatoes and add the kale and all remaining ingredients. Stir well. Using a well-rounded tablespoon, form into balls about 1 inch across. Place them on an oiled baking sheet or, preferably, a baking sheet covered with a silicone mat or parchment paper. Bake for 20 minutes. Carefully turn over and bake fore 20 minutes more, until lightly browned.

Kale Caesar Salad with Roasted Garlic Dressing

IMG_1601-001
1 bunch dinosaur or laminate kale
1/4 cup croutons
1 tbsp olive oil
1/4 cup grated parmesan cheese
1/2 cup roasted garlic caesar dressing

Remove the stalks from the center of kale
Pile leaves on top of one another and roll together into a cigar. Cut kale into thin ribbons.

Dressing (makes 3/4 cup)
6-10 cloves of roasted garlic
olive oil
Juice of 1 lemon (1/4 cup)
1 tbsp capers
2 anchovy fillets
1/2 tsp salt

Puree the garlic & lemon juice, mustard salt and  1/3 cup olive oil. Taste and add more oil as necessary to get the consistency you like. Store in airtight container (good for up to 2 weeks)

In large bowl toss kale together with dressing. Add parmesan cheese and toss again. Divide among four plates. Top with breadcrumbs and cheese if you like.

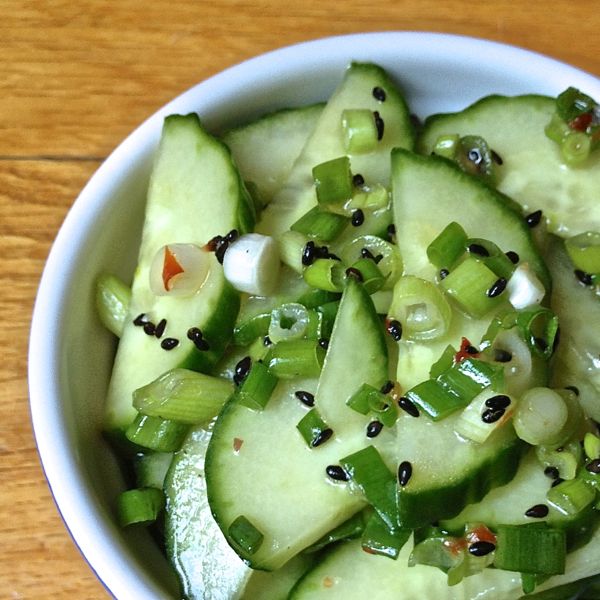
Japanese Quick Pickled Cucumbers

Japanese-Quick-Pickled-Cucumbers-The-Lemon-Bowl
1 seedless cucumber – halved and thinly sliced
2 scallions – diced
¼ cup rice vinegar
2 tablespoons soy sauce – low sodium
1 teaspoon sugar
1 teaspoon sesame oil
1 teaspoon sambal oelek chili paste – optional
back roasted sesame seeds – optional garnish

In a medium bowl, whisk together vinegar, soy, sugar, sesame oil and chili paste.
Add cucumbers and scallions to bowl and toss well. Let sit at room temperature for 15 minutes or longer before serving.

Garnish with black roasted sesame seeds.